Accessing your 2010 Chrysler Town & Country’s owner manual, available online as a PDF, provides crucial information regarding operation, safety, and maintenance procedures.
Overview of the Vehicle
The 2010 Chrysler Town & Country is a versatile minivan designed for families, offering a blend of comfort, convenience, and safety features. This vehicle provides ample seating and cargo space, making it ideal for both daily commutes and long road trips. The owner’s manual details everything from basic operation to advanced features like Stow ‘n Go seating. Understanding your Town & Country’s capabilities, as outlined in the manual, ensures a safe and enjoyable driving experience. It covers essential aspects like engine specifications, dimensions, and towing capacity, empowering owners to maximize their vehicle’s potential.
Importance of the Owner’s Manual
Your 2010 Chrysler Town & Country’s owner’s manual is a vital resource for understanding your vehicle’s operation and maintenance. It contains detailed instructions on safety systems, driving modes, and troubleshooting common issues. Accessing the manual – available online as a downloadable PDF – provides crucial information for maximizing vehicle performance and longevity. Familiarizing yourself with its contents ensures safe operation, proper maintenance scheduling, and a comprehensive understanding of all features. Ignoring the manual could lead to improper use or neglected maintenance, potentially impacting vehicle reliability and safety.
Vehicle Identification
Locate your 2010 Town & Country’s unique Vehicle Identification Number (VIN) for accurate parts ordering and vehicle history information, as detailed in the manual.
Vehicle Identification Number (VIN) Location
The 2010 Chrysler Town & Country’s Vehicle Identification Number (VIN) is crucial for identifying your specific vehicle. You can find this 17-digit code in several locations. Look on the driver’s side dashboard, visible through the windshield.
Additionally, the VIN is located on the vehicle’s registration and insurance documents. It’s also affixed to the driver’s side doorjamb sticker. Refer to your owner’s manual for precise locations and diagrams, ensuring accurate identification for service or parts requests.
Decoding the VIN
Decoding your 2010 Chrysler Town & Country’s VIN reveals valuable information about the vehicle’s origin and specifications. Each digit represents a specific characteristic, including the manufacturer, country of origin, and model year.
The VIN also indicates engine type, assembly plant, and sequential production number. Online VIN decoder tools can translate this code into a comprehensive vehicle history report. This report can reveal important details about the vehicle’s past, aiding in informed decisions regarding maintenance and value.

Safety Information
Your 2010 Town & Country’s manual details critical safety features, including proper seat belt usage, child restraint systems, and airbag functionality for occupant protection.
Safety Restraints – Seat Belts
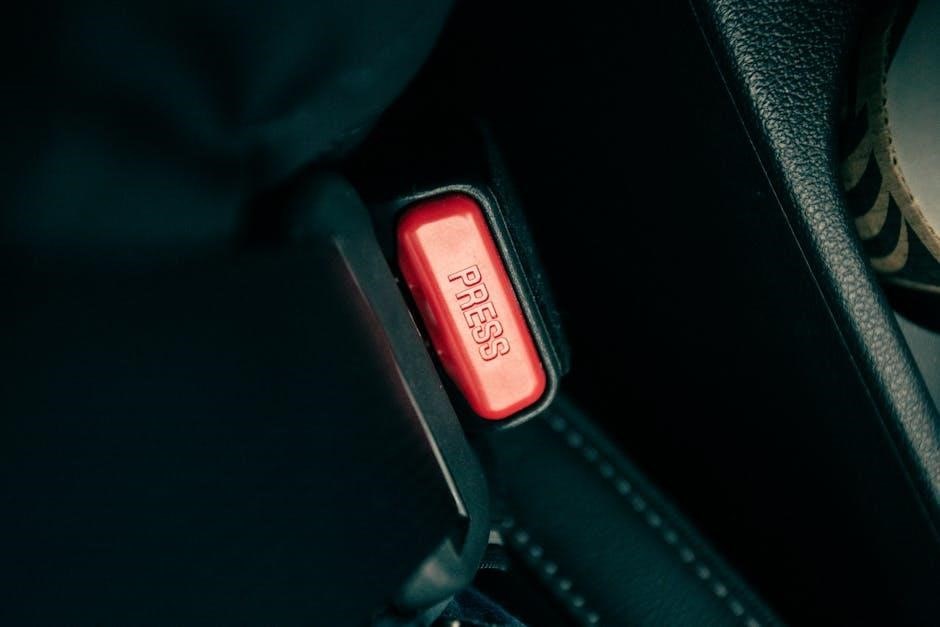
The 2010 Chrysler Town & Country owner’s manual emphasizes the importance of proper seat belt use for all occupants during every trip. It details how to correctly adjust and secure seat belts, ensuring a snug fit.
The manual also clarifies seat belt system components, including retractor mechanisms and buckle operation. It stresses that seat belts are the primary restraint system and must be worn correctly to maximize safety in a collision.
Furthermore, the guide provides specific instructions regarding seat belt usage for pregnant women and children, highlighting the need for appropriate restraint systems based on age and weight.
Child Restraint Systems
The 2010 Chrysler Town & Country owner’s manual provides detailed guidance on selecting and properly installing appropriate child restraint systems. It stresses adhering to all local laws and manufacturer’s instructions for car seats.
The manual outlines LATCH (Lower Anchors and Tethers for CHildren) system usage, detailing anchor point locations within the vehicle. It also covers proper installation using seat belts, emphasizing secure attachment and preventing movement.
Specific recommendations are given based on the child’s age, weight, and height, ensuring the correct type of restraint is utilized for optimal safety.
Airbag System
The 2010 Chrysler Town & Country’s owner manual thoroughly explains the vehicle’s airbag system, including frontal, side, and curtain airbags. It details how the system functions during a collision to minimize occupant injury.
The manual emphasizes the importance of always wearing seatbelts, as airbags are designed to work with seatbelts, not as a replacement. It also provides warnings about potential risks, particularly for children and infants.
Information regarding airbag deactivation, if equipped, and indicator light meanings is clearly outlined for driver awareness and safety.
Emergency Braking System
The 2010 Chrysler Town & Country owner’s manual details the function of the vehicle’s emergency braking system, including Anti-lock Brake System (ABS). It explains how ABS assists in maintaining steering control during hard braking situations and on slippery surfaces.
The manual instructs drivers on proper emergency braking techniques, emphasizing firm and continuous pedal pressure.
It also clarifies that ABS may cause a pulsing sensation in the brake pedal, which is normal operation, and cautions against releasing pressure prematurely.

Operating Your Vehicle
The 2010 Chrysler Town & Country manual provides detailed instructions for starting, stopping, driving modes, fuel information, and understanding dashboard indicators.
Starting and Stopping the Engine
Your 2010 Chrysler Town & Country’s owner manual details the proper procedures for safely starting and stopping the engine. It emphasizes ensuring the vehicle is in Park or Neutral before starting.
The manual also outlines precautions to take, such as fully depressing the brake pedal. Regarding shutdown, it advises against immediately turning off the engine after vigorous driving; allow a brief idle period.
Furthermore, it explains procedures for jump-starting, should the battery become depleted, and provides guidance on emergency engine stops if necessary, prioritizing vehicle and passenger safety.
Driving Modes
The 2010 Chrysler Town & Country owner’s manual explains the available driving modes and their intended uses. While not featuring selectable drive modes like modern vehicles, it details optimal driving techniques for various conditions.
It emphasizes safe operation in differing weather scenarios, such as rain or snow, advising reduced speeds and increased following distances.
The manual also covers considerations for towing, if equipped, and provides guidance on utilizing the vehicle’s features for enhanced control and stability during different driving situations.
Fuel Information and Refueling
The 2010 Chrysler Town & Country owner’s manual specifies the recommended fuel grade – regular unleaded gasoline – and octane rating for optimal engine performance. It details the fuel tank capacity, aiding in estimating range.
Refueling instructions emphasize safety precautions, like avoiding smoking or open flames near the fuel filler.
The manual also explains the location of the fuel filler door release and provides guidance on proper fueling procedures, ensuring correct operation and preventing damage to the vehicle’s fuel system.
Dashboard Indicators and Warnings
Your 2010 Chrysler Town & Country’s owner manual thoroughly explains each indicator light and warning symbol displayed on the instrument panel. These signals communicate vital information about the vehicle’s systems.
Understanding these alerts – from low fuel to engine trouble – is crucial for safe operation and preventative maintenance.
The manual details the actions to take when a warning light illuminates, ranging from simple checks to seeking immediate professional service, ensuring prompt attention to potential issues.

Maintenance Schedule
The 2010 Town & Country owner’s manual outlines a detailed maintenance schedule, covering routine tasks and fluid checks for optimal vehicle performance.
Routine Maintenance Tasks
Your 2010 Chrysler Town & Country’s longevity depends on consistent routine maintenance. The owner’s manual details essential checks like inspecting fluid levels – engine oil, coolant, brake, power steering, and windshield washer fluid – regularly. Tire rotations are crucial for even wear, extending their lifespan and ensuring optimal handling.
Additionally, the manual recommends periodic inspections of belts, hoses, and filters (air, cabin, and fuel). Following the recommended intervals for oil changes and filter replacements is paramount for engine health. Don’t neglect checking lights, wipers, and the exhaust system for any signs of damage or wear.
Fluid Checks and Replacements
The 2010 Chrysler Town & Country owner’s manual emphasizes regular fluid checks. Engine oil should be inspected monthly and replaced according to the mileage schedule. Coolant levels are vital for temperature regulation; use the specified type. Brake fluid must be checked for contamination and replaced periodically to maintain stopping power.
Power steering and transmission fluids also require monitoring and eventual replacement. Windshield washer fluid should be topped off frequently. Proper fluid levels and timely replacements are crucial for preventing component damage and ensuring optimal vehicle performance and reliability.
Tire Maintenance
Your 2010 Chrysler Town & Country’s owner manual stresses the importance of proper tire care. Regularly check tire pressure – including the spare – and inflate to the recommended PSI found on the vehicle’s doorjamb sticker. Inspect tires for wear, damage, and uneven tread patterns.
Rotate tires according to the recommended schedule to promote even wear and extend their lifespan. Tire replacement should occur when tread depth reaches the legal limit. Maintaining correct tire inflation and condition enhances safety, fuel efficiency, and handling performance.

Features and Controls
The 2010 Town & Country manual details operation of features like climate control, the audio system, power windows/locks, and versatile seating/storage options.
Climate Control System
Your 2010 Chrysler Town & Country’s climate control system, thoroughly explained in the owner’s manual, offers multi-zone temperature control for passenger comfort. The manual details operation of the heating, ventilation, and air conditioning (HVAC) system, including settings for automatic and manual modes. Learn how to adjust fan speed, temperature, and airflow direction. It also covers rear climate controls, if equipped, allowing independent temperature settings for second and third-row passengers. Understanding these controls ensures optimal comfort and efficient system use, maximizing fuel economy and passenger satisfaction throughout all seasons.
Audio System
The 2010 Chrysler Town & Country’s audio system, detailed within the owner’s manual, provides various entertainment options. Explore functionalities like AM/FM radio, CD player, and auxiliary input for connecting external devices. The manual explains how to navigate the system’s menus, adjust volume, and manage presets. If equipped, learn about features like SiriusXM satellite radio and integrated Bluetooth connectivity for hands-free calling and audio streaming. Understanding these controls enhances your driving experience, providing convenient access to your preferred audio sources while maintaining focus on the road.
Power Windows and Locks
The 2010 Chrysler Town & Country’s power windows and locks are covered extensively in the owner’s manual. It details operation of both driver and passenger controls, including master switch functionality. Learn about features like the window lockout function, preventing rear passengers from operating their windows. The manual also explains the operation of the power door locks, remote keyless entry system, and auto-locking features. Proper understanding ensures safe and convenient control of these essential vehicle functions for all occupants.
Seating and Storage
The 2010 Chrysler Town & Country owner’s manual provides detailed information regarding its versatile seating configurations and ample storage options. It explains how to utilize features like Stow ‘n Go seating, folding second-row seats flat into the floor for maximized cargo space. Discover details on adjusting seats, headrests, and accessing hidden storage compartments throughout the vehicle. The manual also covers proper use of child safety seat anchors and securing cargo to prevent shifting during travel, ensuring passenger safety and convenience.

Troubleshooting
The 2010 Chrysler Town & Country manual details common issues, potential solutions, and interpretations of warning lights for quick problem diagnosis.
Common Issues and Solutions
The 2010 Chrysler Town & Country owner’s manual provides guidance on addressing frequently encountered problems. These include issues with the electrical system, such as malfunctioning power windows or locks, and potential engine performance concerns.
It also covers troubleshooting for climate control malfunctions, audio system problems, and difficulties with the Stow ‘n Go seating system. The manual offers step-by-step instructions for basic diagnostics and suggests when professional service is required, ensuring vehicle reliability and owner peace of mind.
Warning Light Meanings
Your 2010 Chrysler Town & Country’s owner manual meticulously details the meaning of each dashboard warning light. Understanding these indicators is crucial for promptly addressing potential vehicle issues.
Lights range from critical alerts, like the check engine light indicating a serious mechanical problem, to informational signals, such as low tire pressure. The manual clarifies the severity of each warning, advising whether immediate attention or routine maintenance is necessary, promoting safe and informed driving practices.

Warranty Information
The 2010 Chrysler Town & Country owner’s manual outlines the basic vehicle and powertrain warranties, detailing coverage periods and associated conditions.
Basic Vehicle Warranty
The 2010 Chrysler Town & Country’s basic vehicle warranty, as detailed in the owner’s manual, typically covers defects in materials or workmanship for a specified period. This coverage generally extends for 3 years or 36,000 miles, whichever occurs first, from the original purchase date.
It encompasses a wide range of components, offering peace of mind to the vehicle’s owner. The manual clearly defines what is covered and excluded, alongside the procedures for filing a warranty claim. Understanding these terms is vital for maximizing the benefits of this essential protection.
Powertrain Warranty
The 2010 Chrysler Town & Country’s powertrain warranty, outlined in the owner’s manual, provides coverage for major vehicle components. This typically includes the engine, transmission, and drivetrain for a longer duration than the basic warranty. Specifically, it often extends to 5 years or 100,000 miles, whichever comes first, from the original purchase date.
This warranty safeguards against substantial repair costs, offering extended protection for critical systems. The manual details specific covered parts and any associated deductibles, ensuring owners are fully informed about their coverage.

Specifications
The 2010 Chrysler Town & Country owner’s manual details engine types, dimensions, vehicle capacities, and weight specifications for comprehensive vehicle information.
Engine Specifications
The 2010 Chrysler Town & Country owner’s manual provides detailed engine specifications for all available engine options. This includes information on engine type, displacement (typically 3.8L V6 or 4.0L V6), horsepower, torque, and compression ratio.
Furthermore, it outlines the recommended fuel type, oil capacity, and cooling system capacity for each engine. The manual also specifies firing order and other crucial technical details essential for proper maintenance and repair procedures, ensuring optimal engine performance and longevity.
Dimensions and Capacities
Your 2010 Chrysler Town & Country owner’s manual details crucial dimensional specifications, including overall vehicle length, width, and height, alongside wheelbase measurements. It also lists interior dimensions like headroom, legroom, and cargo capacity – both with all seats in use and when folded down.
Capacities are thoroughly covered, specifying fuel tank volume, coolant capacity, oil capacity (varying by engine), and maximum payload. This information is vital for understanding vehicle limitations and ensuring safe operation.
Towing Information
The 2010 Town & Country owner’s manual outlines towing capacity, trailer wiring diagrams, and essential guidelines for safe towing practices and equipment.
Towing Capacity
Determining the correct towing capacity for your 2010 Chrysler Town & Country is vital for safe operation, and detailed information resides within the owner’s manual. Factors influencing this capacity include engine type, drivetrain configuration, and optional equipment installed on the vehicle.
Exceeding the specified towing limits can compromise vehicle handling, braking performance, and potentially cause mechanical damage. The manual provides specific weight limits for both trailer weight and tongue weight, ensuring optimal stability during towing.
Always consult the manual before attempting to tow any load, and adhere strictly to the recommended guidelines for a secure towing experience.
Trailer Wiring
Proper trailer wiring is essential for safe towing with your 2010 Chrysler Town & Country, and the owner’s manual details the correct wiring configuration. It outlines the necessary connections for lights – including brake lights, turn signals, and running lights – ensuring visibility and compliance with traffic regulations.
The manual illustrates the wiring diagram and specifies the appropriate gauge wire for the trailer.
Incorrect wiring can lead to malfunctioning lights or even damage to the vehicle’s electrical system; therefore, careful adherence to the manual’s instructions is paramount.

Customer Assistance
For support regarding your 2010 Town & Country, contact Chrysler Customer Care or locate an authorized service center for professional assistance and repairs.
Chrysler Customer Care
Should you require further assistance beyond the 2010 Chrysler Town & Country owner’s manual, Chrysler Customer Care stands ready to provide support. They can address specific questions about your vehicle’s features, operation, or warranty coverage.
Contacting them directly can resolve concerns efficiently. Their dedicated team offers expertise and guidance to ensure a positive ownership experience. Resources are available online, including FAQs and contact information, facilitating easy access to the help you need for your vehicle.
Locating a Service Center
For professional maintenance and repairs of your 2010 Chrysler Town & Country, locating an authorized service center is essential. Chrysler’s website provides a convenient “Find a Dealer” tool, allowing you to search for nearby locations based on your zip code.
These centers employ trained technicians familiar with your vehicle’s specific needs, ensuring quality service. Utilizing a certified service center helps maintain your vehicle’s performance and protects its warranty, offering peace of mind.

Index
The index offers an alphabetical and numerical listing of topics and diagrams within the 2010 Chrysler Town & Country owner’s manual.
Alphabetical Listing of Topics
A comprehensive alphabetical index within the 2010 Chrysler Town & Country owner’s manual facilitates quick location of specific information. Topics range from airbag systems and audio controls to brake functionality, child safety restraints, climate control operation, detailed dashboard indicator explanations, emergency procedures, engine specifications, fluid check guidelines, and power window/lock usage. Further entries cover routine maintenance schedules, safety restraint systems, towing capacities, troubleshooting common issues, understanding warning lights, vehicle identification details (including the VIN), and warranty information. This organized structure ensures efficient access to the manual’s extensive content.
Numerical Listing of Diagrams
The 2010 Chrysler Town & Country owner’s manual incorporates a numerical listing of diagrams to visually supplement textual explanations. These diagrams illustrate components like the airbag system locations, brake system layouts, climate control panel features, dashboard indicator symbols, engine components, and interior lighting configurations; They also depict fuse box diagrams, seating arrangements, and towing connection points. This visual aid enhances understanding of complex systems and procedures, providing a clear reference for maintenance and troubleshooting tasks, improving overall vehicle comprehension.