
Murray, a brand now owned by Briggs & Stratton, offers diverse riding mowers. These manuals provide essential guidance for operating and maintaining your mower. They often include parts lists and diagrams for easy understanding of the assembly.
Overview of Murray Lawn Mowers
Murray lawn mowers, now part of the Briggs & Stratton family since 2005, are known for providing a variety of options suitable for different lawn sizes and terrains. These mowers are designed to deliver efficient grass cutting, catering to both residential and some commercial needs. The brand includes a range of models, from walk-behind mowers to larger riding mowers, each designed with specific features and capabilities. The manuals often highlight the user-friendly aspects of these machines, emphasizing ease of operation and maintenance. Many users appreciate the reliability of Murray mowers, noting their robustness and longevity. Furthermore, the manuals often provide detailed diagrams of the various parts, ensuring users can easily identify and replace components as needed. Murray aims to provide a cost-effective solution for lawn care, and their manuals reflect this focus by providing clear and accessible instructions for users of all skill levels. The brand’s legacy continues with Briggs & Stratton’s commitment to quality and durability.

Key Components and Parts
Understanding your Murray lawn mower involves knowing its key parts. This includes engine components, the blade assembly, and the discharge chute. Manuals provide detailed diagrams for easy identification and maintenance of these parts.
Engine Components and Maintenance
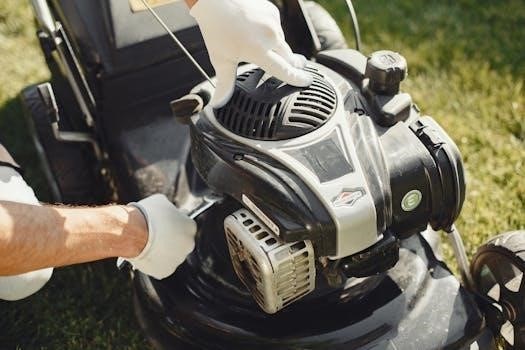
Murray lawn mowers, often powered by Briggs & Stratton engines, require regular maintenance for optimal performance. Key engine components include the carburetor, which mixes fuel and air, and spark plugs, which ignite the mixture. The carburetor, for models like the 21 MTD Murray 500E, requires periodic cleaning. Regular checks of the fuel system, including the fuel valve under the tank, are necessary. Engine maintenance also involves replacing the air filter and changing the engine oil at specified intervals. These actions ensure reliable starting and operation. Using the correct engine oil and fuel mix, as detailed in your manual, is crucial. Always follow the manufacturer’s instructions for parts like replacement carburetors and tune-up kits. Proper upkeep of these components extends the life of the engine and mower.
Blade and Spindle Assembly
The blade and spindle assembly is crucial for the cutting performance of your Murray lawn mower. The spindle assembly, sometimes referred to as a mower deck spindle, holds the blade securely. It enables the rotation of the blade. These assemblies, like the replacement part number 1001200mA, should be inspected regularly for wear and damage. Proper blade maintenance involves sharpening or replacing them when dull or damaged to ensure a clean and efficient cut. The blades are typically attached to the spindle using a bolt and washers and might require special tools. Incorrect installation of the blade and spindle can result in poor cutting performance and possibly damage to the mower. It’s very important to follow the manual’s instructions regarding torque settings when reattaching the blade. Always use genuine Murray parts when replacing components.
Discharge Chute and Related Parts
The discharge chute is a vital component of your Murray lawn mower, responsible for directing the cut grass away from the mower deck. It ensures that clippings are discharged efficiently and safely. The chute and its related parts, such as deflectors or attachments, are frequently shown in the parts manuals. These manuals provide detailed exploded diagrams that help users identify specific parts like a “4 Discharge Chute Group” with part number 1696212-00. The manual may also specify the proper installation and maintenance procedures for the chute assembly. Regular inspection of the chute for blockages, cracks, or damage is important for optimal mower performance and safety. If the chute is damaged, refer to the manual for the correct replacement part and installation process. A blocked or damaged chute can hinder the cutting efficiency of the mower.
Operating Instructions
Operating a Murray lawn mower safely requires understanding specific procedures. These instructions include guidance on starting, stopping, and blade engagement. Proper use ensures efficient lawn care and operator safety.
Starting and Stopping Procedures
Prior to starting your Murray lawn mower, ensure the clutch control lever is disengaged. Locate the fuel shut-off valve, usually situated beneath the fuel tank, and open it. If your mower has a primer bulb, press it several times to introduce fuel to the carburetor. Position the throttle lever to the start position. Turn the ignition key or engage the starter switch to crank the engine. Once started, allow it to warm up briefly. To stop the engine, move the throttle to the idle position, turn the ignition key to the off position, and close the fuel shut-off valve. Always ensure the blades are disengaged before stopping the engine. For manual start models, smoothly pull the recoil cord to start the engine, following the same shut-down procedure. These steps are crucial for safe and efficient operation.
Engaging the Blades Safely
Before engaging the blades on your Murray lawn mower, ensure the area is clear of people, pets, and debris. Always start the engine first and allow it to warm up. To engage the blades, locate the blade engagement lever or switch, often found near the steering wheel or on the dash. Pull or push the lever to its engaged position. This action activates the cutting mechanism. When engaging the blades, keep a firm grip on the steering wheel and be prepared for a slight jolt. Never engage the blades when the engine is running at high speed. Always disengage the blades when the mower is not actively cutting grass, when crossing non-grass surfaces or while transporting the mower. The blades should be engaged smoothly to prevent damage and ensure safe operation. Failure to adhere to these guidelines can cause accidents and damage to the equipment.

Maintenance and Troubleshooting
Maintaining your Murray mower is crucial for longevity. Regular checks and timely fixes prevent many issues. This section will guide you through routine maintenance and troubleshooting common problems to ensure optimal performance.
Routine Maintenance Schedule
A well-maintained Murray lawn mower ensures efficient and reliable operation. Following a routine maintenance schedule is crucial for its longevity and performance. Regularly inspect the engine components, like spark plugs and air filters, and replace them as needed. Check the oil level before each use and change it according to the manufacturer’s recommendation. Ensure the blades are sharp and balanced for a clean cut, and consider replacing them when worn. The spindle assembly should be inspected for any play or damage and lubricated if required. Examine the discharge chute for any obstructions and ensure it is properly attached. Additionally, review the belts and pulleys for wear and tear. Proper tire inflation is important for even cutting and maneuverability. Finally, keep the mower clean by removing grass clippings and debris after each use. This regular upkeep will contribute to the mower’s overall health and efficiency.
Troubleshooting Common Issues
Encountering issues with your Murray lawn mower can be frustrating, but many problems can be resolved with simple troubleshooting. If the engine fails to start, check the fuel level, spark plug, and air filter. A clogged air filter or a faulty spark plug can prevent ignition. If the engine starts but stalls, examine the carburetor for blockages, which are common. Uneven cuts often indicate dull or damaged blades, requiring sharpening or replacement. Vibrations during operation might signal a loose or damaged spindle assembly. Inspect the discharge chute for clogs, as they can affect cutting performance. If the mower has starting problems, check the fuel line and ensure the fuel is fresh. A loose or damaged belt can cause problems with blade engagement or drive. Difficulty in turning can be attributed to low tire pressure. Refer to the manual for specific wiring diagram details to assist in electrical issues. Addressing these common issues will keep your mower running smoothly.

Wiring Diagrams and Electrical System
Understanding the wiring of your Murray mower is essential for troubleshooting electrical problems. Diagrams provide a visual guide to the electrical components. These diagrams often show the connections for starting and safety switches.
Understanding Wiring Diagrams
Murray lawn mower wiring diagrams are crucial for diagnosing electrical issues. These diagrams visually represent the complex network of wires, switches, and electrical components within your mower. They illustrate how power flows through the system, enabling you to trace circuits and identify potential faults. A typical diagram will show the battery, ignition switch, starter solenoid, safety interlocks, and other key electrical parts. Understanding the symbols and conventions used in these diagrams is essential for effective troubleshooting. For example, different colors of wires often represent specific circuits. By carefully following the diagram, you can pinpoint shorts, opens, or faulty components. This knowledge can save you time and money by allowing you to perform repairs yourself. Consulting the wiring diagram before attempting any electrical work is always recommended. It ensures a safe and accurate approach to resolving electrical problems. These diagrams may include information about fuses and relays.