self-guided bike tours new zealand

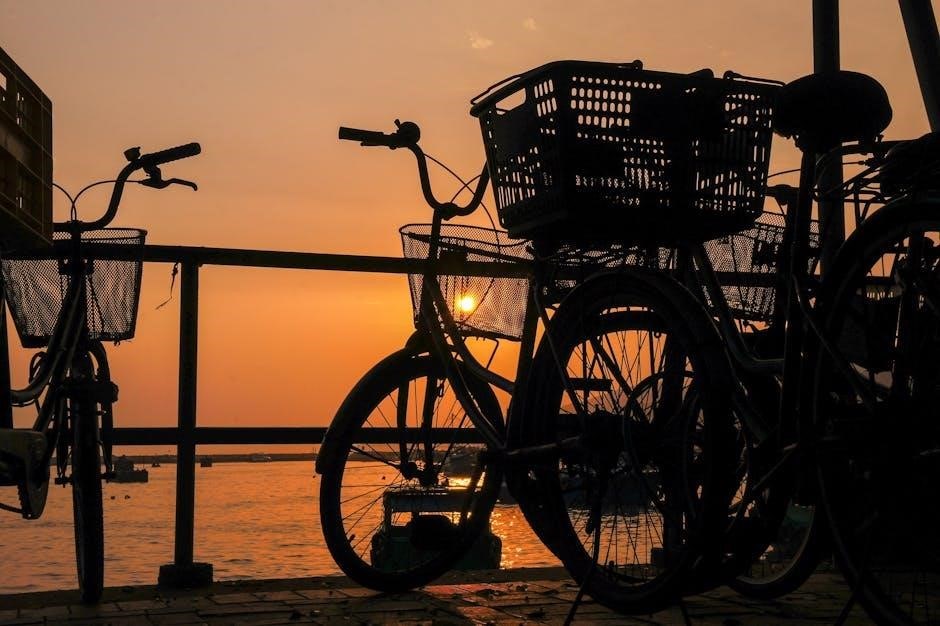
Explore New Zealand’s stunning landscapes and diverse trails with self-guided bike tours‚ offering flexibility and immersion in nature‚ culture‚ and local cuisine‚ perfect for all skill levels.

What are Self-Guided Bike Tours?

Self-guided bike tours in New Zealand offer a flexible and immersive way to explore the country’s stunning landscapes and diverse trails. Designed for cyclists of all skill levels and ages‚ these tours provide independence‚ allowing riders to set their own pace and itinerary. Participants can choose from a variety of routes‚ including recreational paths‚ off-road adventures‚ and scenic trails‚ ensuring an unforgettable experience. With options for bike rentals‚ accommodations‚ and support services‚ self-guided tours cater to both experienced cyclists and casual riders‚ making them an ideal way to discover New Zealand’s natural beauty‚ culture‚ and cuisine at your own rhythm.

Why Choose New Zealand for a Self-Guided Bike Tour?

New Zealand is a paradise for self-guided bike tours‚ offering a diverse range of landscapes‚ from rugged mountains to pristine coastlines. The country boasts well-marked trails‚ scenic routes‚ and a strong cycling culture. Quiet roads‚ stunning vistas‚ and varied terrain cater to all skill levels. Experience the freedom to explore at your own pace‚ immersing in nature‚ wildlife‚ and local culture. With its compact size and accessible infrastructure‚ New Zealand makes it easy to plan and enjoy an unforgettable adventure. The unique blend of natural beauty and adventure creates an ideal destination for cyclists seeking an inspiring journey.

Popular Destinations for Self-Guided Bike Tours in New Zealand

New Zealand offers diverse landscapes‚ from mountains to coastlines‚ with well-marked trails and quiet roads. Its compact size and natural beauty make it perfect for self-guided cycling adventures.

South Island Highlights

The South Island offers some of New Zealand’s most breathtaking landscapes for self-guided bike tours. Queenstown‚ known as the adventure capital‚ provides access to scenic trails like the Queenstown Trail and stunning views of Lake Wakatipu. Wanaka‚ with its picturesque lakeside setting‚ is another favorite‚ offering routes like the Wanaka River Trail. The Southern Alps provide a dramatic backdrop‚ while the West Coast’s rugged beauty and the Marlborough Sounds’ coastal charm attract cyclists. Popular routes include the Alps to Ocean Cycle Trail and the Central Otago Rail Trail‚ offering diverse terrain and unforgettable scenery for riders of all levels.

North Island Adventures

The North Island offers diverse and thrilling experiences for self-guided bike tours. Auckland’s scenic trails‚ such as the Twin Coast Cycleway‚ provide a gateway to coastal and forest landscapes. The Coromandel Peninsula is renowned for its rugged beauty‚ with routes like the Hauraki Rail Trail offering insights into local history. Rotorua‚ with its geothermal wonders‚ features the Whakarewarewa Forest and Te Ara Ahi trail‚ perfect for mountain biking. Wellington’s Rimutaka Cycle Trail and the Kapiti Coast add urban and natural charm. These destinations showcase the North Island’s rich cultural heritage and stunning diversity‚ making it a must-explore region for cyclists.

Best Trails for Self-Guided Tours

New Zealand boasts an array of world-class trails perfect for self-guided bike tours. The Alps to Ocean Cycle Trail is a standout‚ offering a 312km journey from the Southern Alps to the Pacific Ocean‚ with stunning views and well-marked paths. The Queenstown Trail is another favorite‚ featuring scenic routes around Lake Wakatipu and the Remarkables. For a more leisurely ride‚ the Timber Trail in the North Island combines historic logging routes with breathtaking forest vistas. These trails are designed for varying skill levels‚ ensuring an unforgettable cycling experience across New Zealand’s diverse landscapes.

Exploring New Zealand’s Wine Regions by Bike

New Zealand’s wine regions offer a unique cycling experience‚ blending scenic rides with wine tasting. The Marlborough region‚ famous for its Sauvignon Blanc‚ features the Marlborough Wine Trail‚ where riders can pedal through vineyards and enjoy sampling at local wineries. Nelson‚ Central Otago‚ and Hawke’s Bay also provide picturesque routes‚ with stops at boutique wineries. Cycling allows for a leisurely pace‚ enabling riders to soak in the countryside and enjoy gourmet cuisine. Many tours include wine transportation services‚ so cyclists can indulge without worry. This combination of cycling‚ wine‚ and stunning landscapes makes for an unforgettable adventure.

National Parks and Scenic Routes

New Zealand’s national parks and scenic routes offer breathtaking backdrops for self-guided bike tours. Fiordland National Park‚ home to the famous Milford Road‚ provides dramatic mountain and fjord scenery. Abel Tasman National Park features coastal trails with stunning ocean views. The Tongariro Alpine Crossing in Tongariro National Park offers a unique volcanic landscape. Scenic routes like the Great Alpine Highway and the Forgotten World Highway wind through diverse terrains‚ from rugged mountains to lush forests. These routes are designed to showcase New Zealand’s natural beauty‚ making them perfect for cyclists seeking immersive outdoor experiences.

Planning Your Self-Guided Bike Tour

Planning is crucial for a seamless self-guided bike tour in New Zealand. Select routes‚ choose the right bike‚ arrange logistics‚ and prepare thoroughly to ensure an unforgettable adventure.

Choosing the Right Bike for Your Tour

Selecting the right bike is essential for a enjoyable self-guided tour in New Zealand. Opt for a sturdy‚ reliable bike suited to your terrain‚ whether it’s a mountain bike for rugged trails or a road bike for smooth highways. Consider hybrid or gravel bikes for mixed surfaces. Ensure proper fit and comfort‚ as you’ll spend long hours cycling. Test the bike beforehand and check for maintenance. If renting‚ choose a reputable provider with support options. Your bike choice will significantly impact your experience‚ so prioritize durability‚ comfort‚ and suitability for your route.

Packing Essentials for a Self-Guided Tour

Packing smart is vital for a self-guided bike tour in New Zealand. Bring lightweight‚ waterproof clothing and layers for variable weather. Include a reliable helmet‚ cycling gloves‚ and sturdy footwear. Carry a hydration pack‚ water bottle‚ and high-energy snacks. A basic toolkit with a spare tire‚ pump‚ and multi-tool is essential. Don’t forget a map‚ GPS device‚ or smartphone for navigation. Pack a small first-aid kit‚ sunscreen‚ and insect repellent. Bring a lightweight tent‚ sleeping bag‚ and camping gear if planning overnight stays. Ensure you have a phone‚ camera‚ and portable charger to capture memories. Organize your gear efficiently for a balanced ride.

Mapping and Navigation Tools

Reliable mapping and navigation tools are crucial for self-guided bike tours in New Zealand. Use detailed physical maps or GPS devices preloaded with local trails and routes. Smartphone apps like Maps.me or Komoot are excellent for real-time navigation and offline access. Download maps in advance for areas with limited internet coverage. Carry a compass as a backup. Many cyclists also rely on New Zealand’s official cycle trail apps‚ such as the NZ Cycle Trail app‚ for up-to-date information. Always test your devices before departure and carry a power bank to keep them charged. Clear signage on major trails further aids navigation.

Setting a Realistic Itinerary

Creating a realistic itinerary is key to enjoying your self-guided bike tour in New Zealand. Consider your fitness level‚ terrain difficulty‚ and daily riding distance (typically 40-70 km). Allow rest days to explore highlights and recover. Factor in time for unexpected delays‚ such as weather or mechanical issues. Plan around seasonal opening hours for attractions and accommodations. Balance riding time with sightseeing to avoid burnout. Use online resources or consult with local experts to estimate travel times accurately. A well-paced itinerary ensures a memorable and stress-free adventure‚ letting you soak in New Zealand’s stunning landscapes without rushing.

Booking Accommodations Along the Way

Booking accommodations in advance is crucial for a smooth self-guided bike tour in New Zealand‚ especially during peak seasons. Research options like hotels‚ B&Bs‚ or bike-friendly lodges near your route. Look for places offering secure bike storage‚ laundry facilities‚ and meal options. Use online platforms or local tourism websites to find and reserve accommodations. Consider the distance between stops and ensure your bookings align with your itinerary. Popular trails like the Alps to Ocean or Queenstown Trail often have recommended stops‚ so plan ahead to secure convenient and comfortable stays. Early booking ensures availability and avoids last-minute stress.

Preparation and Safety

Ensure you carry a basic toolkit‚ spare tires‚ and first aid kit. Always inform someone of your route and check your bike before departure. Plan for safety gear and emergencies.

Physical Conditioning and Fitness Requirements

A reasonable level of fitness is essential for self-guided bike tours in New Zealand. Riders should be comfortable cycling 40-80 km daily‚ depending on terrain. Start training 6-8 weeks in advance‚ focusing on endurance and stamina. Incorporate strength exercises for core and leg muscles‚ as well as flexibility routines to prevent injury. Practice on varied terrain to build adaptability. While some routes are challenging‚ many tours cater to different fitness levels. Rest days are important to avoid burnout. Ensure you’re prepared for the physical demands to fully enjoy the stunning landscapes and immersive experiences New Zealand offers.

Understanding New Zealand’s Road Rules

Understanding New Zealand’s road rules is crucial for a safe and enjoyable self-guided bike tour. Cyclists must ride on the left side of the road and obey all traffic signals. Helmets are mandatory‚ and hand signals are recommended for safety. Be aware of shared paths and pedestrian crossings. Roundabouts require cyclists to signal intentions clearly. Stay vigilant for one-lane bridges and narrow roads‚ especially in rural areas. Familiarize yourself with local signs and markings. Respect speed limits and always prioritize caution when sharing roads with vehicles. Knowledge of these rules ensures compliance and enhances safety during your cycling adventure in New Zealand.

Emergency Preparedness and First Aid

When embarking on a self-guided bike tour in New Zealand‚ it’s essential to be prepared for emergencies. Carry a well-stocked first aid kit with supplies for treating cuts‚ scrapes‚ and sprains. Include pain relievers‚ bandages‚ antiseptic wipes‚ and blister care. Always bring a phone or portable charger to call for help in case of an accident. Familiarize yourself with basic first aid techniques‚ such as wound cleaning and splinting. Consider carrying a personal locator beacon (PLB) for remote areas with no cell coverage. Keep emergency contact details handy and know the location of nearby medical facilities. Preparation ensures safety and peace of mind.

Weather and Climate Considerations

New Zealand’s climate varies significantly between the North and South Islands. The North Island enjoys a subtropical climate with warmer temperatures‚ while the South Island is cooler‚ with alpine conditions in the mountains. Cyclists should prepare for unpredictable weather‚ with rain possible year-round. Summer (December to February) is ideal for cycling‚ offering long days and mild temperatures. Pack layers‚ including breathable fabrics‚ waterproof gear‚ and windproof jackets. Check local forecasts before departure and plan routes to avoid extreme weather. Be prepared for strong winds‚ especially in coastal areas. Always carry a lightweight rain jacket and gloves for cooler mornings and evenings.

Insurance and Liability Coverage

Ensuring adequate insurance is crucial for a self-guided bike tour in New Zealand. Travel insurance that covers cycling activities is essential‚ as it protects against medical emergencies‚ bike damage‚ or theft. Liability coverage is also vital in case of accidents involving others. Check if your rental bike includes insurance or if it must be purchased separately. Some policies may exclude high-risk activities‚ so review your coverage carefully. Additionally‚ consider insurance that covers trip cancellations or interruptions. Understanding your policy’s terms ensures peace of mind while exploring New Zealand’s scenic trails and roads. Always carry proof of insurance with you during your tour.

Cultural and Culinary Experiences

Immerse yourself in New Zealand’s rich culture and savor local cuisine. Enjoy paddle steamer rides‚ Maori hangi‚ and artisanal foods. Explore wine regions‚ blending adventure with culinary delights‚ creating unforgettable memories.

Immersing in Maori Culture

Discover New Zealand’s indigenous heritage by engaging with Maori culture during your bike tour. Visit historic marae‚ attend a traditional hangi feast‚ and witness captivating performances of the haka and poi dances. Many self-guided tours offer opportunities to connect with local iwi (tribes)‚ fostering deeper cultural understanding. Cycle through regions rich in Maori history‚ such as Rotorua or Taupo‚ where storytelling and art reflect ancient traditions. These experiences provide a meaningful way to respect and celebrate New Zealand’s diverse cultural identity while exploring its stunning landscapes on two wheels.

Exploring Local Cuisine and Wine

New Zealand’s culinary scene offers a delicious blend of fresh produce‚ artisanal products‚ and award-winning wines. During your self-guided bike tour‚ indulge in local specialties like lamb‚ seafood‚ and seasonal fruits. The country is renowned for its wine regions‚ such as Marlborough‚ Central Otago‚ and Hawke’s Bay‚ where you can sample world-class Sauvignon Blanc and Pinot Noir. Many bike trails pass through vineyards and charming cafes‚ allowing you to enjoy gourmet meals and wine tastings. Savoring New Zealand’s cuisine and wine enhances your cycling adventure‚ offering a taste of the country’s rich culinary heritage.

Engaging with Local Communities

Engaging with local communities enriches your self-guided bike tour experience in New Zealand. Many small towns and villages along popular cycling routes offer charming cafes‚ craft shops‚ and local markets. Stop to chat with friendly Kiwis‚ who are eager to share stories about their region. Consider joining community events or farmers’ markets to immerse yourself in the local culture; These interactions provide a deeper connection to the places you visit‚ making your journey more meaningful and memorable. Engaging with locals also offers insider tips on hidden gems and must-visit spots along your route.

Combining Cycling with Other Activities

Self-guided bike tours in New Zealand offer the perfect opportunity to mix cycling with other outdoor pursuits. Many cyclists combine their rides with hiking in stunning locations like Abel Tasman National Park or Fiordland. Kayaking in Milford Sound or Marlborough Sounds is another popular option‚ allowing you to explore New Zealand’s pristine waterways. Wildlife tours‚ such as spotting dolphins or seals‚ add an extra layer of adventure. With the flexibility of a self-guided tour‚ you can create an itinerary that blends cycling with your favorite activities‚ making your trip a diverse and unforgettable experience in New Zealand’s breathtaking landscapes.

Unique Experiences on a Self-Guided Tour

Discover New Zealand’s breathtaking landscapes‚ from rugged coastlines to serene forests‚ at your own pace. Enjoy flexibility‚ cultural interactions‚ and unforgettable wildlife encounters‚ creating lasting memories.

Cycling Through New Zealand’s Stunning Landscapes

New Zealand’s diverse landscapes offer an unparalleled cycling experience. From the Southern Alps’ majestic peaks to the serene fjords of Fiordland‚ riders can explore pristine natural beauty. The South Island’s rugged coastlines‚ like the Kaikōura Peninsula‚ contrast with the North Island’s geothermal wonders and lush forests. Cycle through rolling green hills‚ vineyards‚ and along scenic coastal routes‚ immersing yourself in the country’s untouched wilderness. Each pedal stroke reveals a new breathtaking vista‚ making every moment unforgettable. With varied terrain‚ cyclists of all levels can connect with nature and experience the raw beauty of Aotearoa.

Wildlife and Nature Encounters

New Zealand’s self-guided bike tours offer countless opportunities to connect with its unique wildlife and pristine natural environments. Spot iconic native birds like kiwis‚ kakapos‚ and tui in their habitats. Coastal routes allow encounters with seals‚ penguins‚ and dolphins. Riders can explore native forests‚ home to ancient trees and diverse flora. The freedom to stop and observe wildlife at your own pace is a highlight. From bird sanctuaries to marine reserves‚ New Zealand’s untouched ecosystems provide unforgettable experiences. Cycling through these environments allows for a deeper connection with the natural world and its incredible biodiversity.

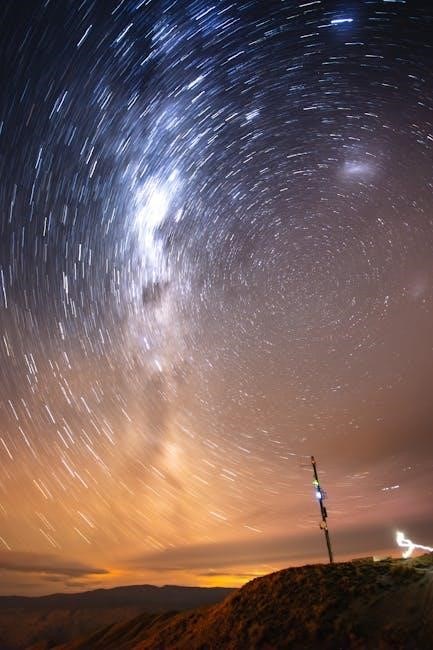
Night Sky Experiences

New Zealand’s pristine night skies offer a magical experience for cyclists on self-guided tours. The country’s remote landscapes and lack of light pollution create perfect conditions for stargazing. Aoraki Mackenzie Dark Sky Reserve and Great Barrier Island are UNESCO Dark Sky Sanctuaries‚ offering breathtaking views of the Milky Way‚ constellations‚ and even the Southern Lights (aurora australis). Riders can pause at secluded spots‚ immerse themselves in the tranquility of the night‚ and connect with the vastness of the universe. These moments add a unique dimension to the adventure‚ blending daytime exploration with celestial wonder.

Historical and Cultural Landmarks

New Zealand’s self-guided bike tours offer a unique opportunity to explore the country’s rich history and cultural heritage. Cyclists can visit iconic landmarks like the Treaty of Waitangi grounds‚ where New Zealand’s founding document was signed‚ and the historic colonial towns of Russell and Oamaru. Riders can also discover Maori archaeological sites‚ such as ancient pa (fortified villages)‚ and ride along heritage trails that showcase the country’s pioneering past. These landmarks provide a deeper connection to New Zealand’s identity‚ blending history with the natural beauty of the landscapes.

Budgeting and Cost Management

Budgeting for a self-guided bike tour in New Zealand requires careful planning. Average daily costs range from $80 to $150‚ covering bike rentals‚ meals‚ and lodging.

Estimating Costs for a Self-Guided Tour

Estimating costs for a self-guided bike tour in New Zealand involves considering bike rentals‚ accommodation‚ food‚ and transportation. Bike rentals range from $30 to $70 per day‚ while accommodation can vary from $50 to $150 nightly‚ depending on options like hostels or lodges. Food expenses average $30 to $50 daily‚ including meals and snacks. Transportation costs‚ such as ferry rides or shuttles‚ can add $50 to $100. Miscellaneous expenses‚ like gear and attractions‚ should also be factored in. Overall‚ a daily budget of $150 to $300 per person is realistic‚ ensuring a comfortable and enjoyable experience.

Saving Money on Accommodation and Dining

Saving Money on Accommodation and Dining

To save money on accommodation‚ consider camping or staying in budget-friendly lodgings like hostels or holiday parks. Many offer kitchen facilities‚ allowing you to prepare meals and reduce dining costs; For dining‚ opt for local cafes and pubs serving affordable meals like fish and chips or sandwiches. Preparing snacks and meals in advance can also cut expenses. Book accommodations in advance during peak seasons to secure better rates. Additionally‚ use apps or websites to find budget-friendly options. Combining practical choices with local cuisine ensures a cost-effective and enjoyable experience during your self-guided bike tour.

Budgeting for Bike Rentals and Equipment

Budgeting for bike rentals and equipment is crucial for a cost-effective self-guided tour. Average bike rental costs range from $40 to $80 NZD per day‚ depending on the type and quality of the bike. Longer rentals often offer discounts‚ so inquire about weekly rates. Additional costs include helmets‚ locks‚ and panniers‚ which can add $10–$20 NZD daily. Budget extra for repair kits‚ lights‚ and optional GPS devices. Booking equipment in advance ensures availability and better pricing. Allocate $50–$100 NZD per week for miscellaneous cycling-related expenses to avoid overspending.

Additional Expenses to Consider

Additional expenses on a self-guided bike tour include transportation‚ food‚ and activities. Ferry crossings‚ shuttle services‚ or vehicle transfers can cost $20–$100 NZD per trip. Food expenses vary‚ with picnics costing $10–$15 NZD per day‚ while restaurant meals can range from $25–$50 NZD. Souvenirs‚ entrance fees‚ and optional guided activities add $50–$100 NZD weekly. Emergency funds for unexpected bike repairs or medical needs should also be budgeted. Allocate $200–$300 NZD per week for these extras to ensure a stress-free journey. Planning for these costs helps avoid budget overruns and enhances your overall experience;

Testimonials and Reviews

Riders rave about New Zealand’s breathtaking landscapes‚ seamless self-guided routes‚ and unforgettable experiences; A perfect blend of adventure‚ nature‚ and freedom on two wheels.

What Previous Riders Say About Self-Guided Tours

Previous riders consistently praise the flexibility and freedom of self-guided bike tours in New Zealand. Many highlight the stunning landscapes‚ well-maintained trails‚ and immersive cultural experiences. Cyclists often mention the sense of accomplishment that comes with exploring at their own pace; The ability to stop spontaneously to soak in views or engage with locals is frequently cited as a highlight. Some riders note the challenge of certain routes‚ but most agree the rewards far outweigh the effort. Overall‚ testimonials reflect a deep connection to nature and an unforgettable adventure in one of the world’s most beautiful countries.

Success Stories and Memorable Experiences

Riders often share inspiring tales of conquering iconic routes like the Alps 2 Ocean or the Queenstown Trail. Many recount moments of pure joy‚ such as cycling alongside turquoise lakes or through lush forests. A common highlight is the sense of accomplishment after tackling challenging terrain. Some riders mention unexpected encounters‚ like spotting dolphins while biking near the coast or enjoying a serene sunset at a remote campsite. These experiences often become lifelong memories‚ blending personal achievement with New Zealand’s breathtaking natural beauty and unique cultural charm.

Lessons Learned from Experienced Cyclists

Experienced cyclists emphasize the importance of flexibility and preparedness. Many recommend building extra time into itineraries to account for unpredictable weather or mechanical issues. Carrying a basic tool kit and spare tires is crucial‚ as bike shops may be far apart. Using GPS navigation apps with offline maps is highly advised due to limited cell coverage in remote areas. Booking accommodations in advance‚ especially during peak seasons‚ ensures availability. Respect for the environment and local culture is also stressed‚ as New Zealand prides itself on sustainability. Lastly‚ cyclists often highlight the joy of stopping to explore hidden gems and interact with friendly locals.

Booking and Final Preparations

Research reputable tour operators‚ compare packages‚ and book in advance to secure your spot. Ensure your booking includes bike rentals‚ accommodations‚ and route maps. Pay deposits and review terms carefully.

How to Book a Self-Guided Tour

Booking a self-guided bike tour in New Zealand is straightforward with the right approach. Start by researching reputable tour operators that specialize in self-guided itineraries. Compare their offerings‚ including route options‚ bike quality‚ and support services. Once you’ve chosen a tour‚ review and confirm the itinerary‚ ensuring it aligns with your fitness level and interests. Most operators allow online bookings with a deposit‚ securing your spot. Provide necessary details like travel dates‚ accommodation preferences‚ and bike requirements. Finalize payments as per the operator’s terms‚ typically 30-60 days before departure. Ensure you receive a confirmation package with maps‚ instructions‚ and emergency contacts. Many operators also offer customizable options‚ allowing you to tailor the tour to your preferences. Be sure to read reviews and ask questions to ensure a smooth experience. With everything booked‚ you’re ready to embark on an unforgettable adventure through New Zealand’s stunning landscapes.

Final Checklists Before Departure

Before embarking on your self-guided bike tour in New Zealand‚ ensure everything is in order. Check your bike for proper function‚ including tires‚ brakes‚ and gears. Pack essentials like a repair kit‚ spare tubes‚ and a multi-tool. Confirm accommodations and transportation bookings. Review your itinerary and map routes to avoid last-minute confusion. Carry emergency contacts and a first-aid kit. Check the weather forecast and pack appropriate clothing. Bring a phone or GPS device for navigation. Finally‚ ensure your travel insurance covers cycling activities. A final review ensures a smooth and enjoyable journey.

Staying Connected and Accessing Support

Staying connected during your self-guided bike tour in New Zealand is essential for navigation and emergencies. Most areas have reliable mobile coverage‚ but remote regions may have limited signal. Carry a portable charger and power bank to ensure your devices stay powered. Many tour companies provide 24/7 support‚ including emergency roadside assistance and route guidance. Additionally‚ New Zealand has a well-connected network of local services‚ including bike shops and cafes‚ where you can access Wi-Fi. Don’t forget to save important contact numbers‚ such as emergency services (111) and your tour provider‚ for quick access. Always inform someone of your daily itinerary.

  • Mobile coverage varies; plan for remote areas.
  • Carry backup power sources like a portable charger.
  • Save emergency contacts and tour provider details.
  • Share your itinerary with a trusted contact.

Staying connected ensures safety and allows you to fully enjoy your cycling adventure in New Zealand.

rth8800wf2022 manual

The Honeywell RTH8800WF2022 is a cutting-edge T5 series smart thermostat offering Wi-Fi connectivity, mobile app control, and energy-saving features for optimal home comfort and efficiency.

Overview of the RTH8800WF2022 Model

The Honeywell RTH8800WF2022 is a T5 Smart Thermostat designed for seamless home comfort and energy efficiency. It features advanced smart capabilities, including Wi-Fi connectivity, mobile app integration, and compatibility with various HVAC systems. Known for its user-friendly interface and programmable scheduling, this model allows for precise temperature control and geofencing functionality. The thermostat supports both heating and cooling systems, making it versatile for different climates. Its compact design and UWP mounting system ensure easy installation, while the manual setup option provides flexibility for users without Wi-Fi. As part of Honeywell’s T5 series, the RTH8800WF2022 emphasizes energy savings and smart home integration, catering to modern households seeking convenience and efficiency.

Key Features and Benefits

The Honeywell RTH8800WF2022 offers exceptional features designed to enhance home comfort and energy efficiency. Its Wi-Fi connectivity enables remote control via the Honeywell Home mobile app, allowing users to adjust settings from anywhere. The thermostat supports advanced scheduling options, including home/away and vacation modes, which optimize heating and cooling usage based on occupancy. With geofencing capabilities, the system can automatically adjust temperatures when you leave or arrive home. The UWP mounting system simplifies installation, and the touchscreen interface provides an intuitive user experience. Additionally, the thermostat is compatible with smart home systems, ensuring seamless integration with other devices. These features collectively deliver enhanced convenience, energy savings, and personalized comfort for users.

Importance of the User Manual

The user manual for the Honeywell RTH8800WF2022 thermostat is an essential resource for ensuring proper installation, setup, and operation. It provides detailed instructions for configuring features like Wi-Fi connectivity, scheduling, and smart home integration. The manual also includes troubleshooting guides to resolve common issues, such as display malfunctions or connectivity problems. By following the manual, users can optimize energy efficiency and maximize the thermostat’s capabilities. Additionally, it offers step-by-step installation instructions, reducing the risk of errors during setup. The manual is available in PDF format, making it easily accessible for reference. Regularly reviewing the manual helps users stay informed about advanced settings and customization options, ensuring they get the most out of their thermostat experience.

Compatibility and System Requirements

The Honeywell RTH8800WF2022 thermostat is designed to work seamlessly with most HVAC systems, ensuring compatibility with heating, cooling, and heat pump configurations. It supports both conventional and smart home setups, making it versatile for various household needs. The thermostat requires a C-wire for proper installation, though it is compatible with systems that do not have one by using the provided UWP mounting system. Wi-Fi connectivity enables remote control via the mobile app, requiring a stable internet connection for optimal performance. The thermostat is also compatible with smart home platforms like Amazon Alexa, enhancing its functionality. Ensuring system compatibility and meeting installation requirements guarantees efficient operation and energy savings. Proper setup ensures all features, including scheduling and smart home integration, work as intended.

Installation and Setup

The Honeywell RTH8800WF2022 thermostat installation involves mounting hardware, UWP system compatibility, and manual setup steps. A Quick Install Guide is provided for ease.

Mounting Hardware and Requirements

The Honeywell RTH8800WF2022 thermostat requires specific mounting hardware for installation, including a UWP mounting system. Ensure compatibility with existing HVAC systems and wiring. The thermostat is designed to fit standard wall mounts, and the package includes necessary screws and adapters; Refer to the User Manual for detailed mounting instructions and system requirements. Proper installation ensures optimal performance and safety. Additional tools may be needed for wiring adjustments. Follow the manual’s guidelines to avoid installation errors. The UWP system simplifies mounting, making it a user-friendly process. Always check the compatibility of the mounting hardware with your wall type. The manual provides diagrams and step-by-step instructions for accurate installation. Ensure all components are securely fastened to prevent damage.

Step-by-Step Installation Guide

Begin by turning off the power to your HVAC system at the circuit breaker. Remove the old thermostat and label the wires for reference. Mount the UWP mounting system to the wall using the provided screws, ensuring it is level. Connect the wires to the appropriate terminals on the new thermostat, following the wire labels. Secure the thermostat to the mounting system. Turn the power back on and test the system. Refer to the RTH8800WF2022 manual for specific wiring diagrams and troubleshooting tips. If unsure, consult a licensed electrician. The process is designed to be straightforward, but attention to detail is crucial for proper functionality. Always follow safety precautions when handling electrical systems.

UWP Mounting System Overview

The UWP (Universal Wall Plate) mounting system is included with the Honeywell RTH8800WF2022 thermostat, designed for easy and secure installation. It is compatible with most HVAC systems and features pre-printed wire labels for straightforward connections. The system includes a built-in level to ensure proper alignment and comes with adjustable mounting brackets to fit various wall types. The UWP mount also supports installation without a C-wire, offering flexibility for different setups. Its compact design minimizes the appearance of wires, providing a clean finish. For detailed instructions, refer to the RTH8800WF2022 user manual, which provides step-by-step guidance for a seamless installation process. The UWP system is a key component of the thermostat’s ease of use and compatibility.

Manual Setup Process

The manual setup process for the Honeywell RTH8800WF2022 thermostat allows users to configure basic settings without relying on smart features or Wi-Fi connectivity. Begin by powering on the thermostat and navigating through the menu using the touchscreen interface. Set the current date and time manually by selecting the appropriate options. Choose your preferred temperature units (Fahrenheit or Celsius) for accurate readings. Select your HVAC system type to ensure compatibility with your heating and cooling setup. Configure the temperature range to balance comfort and energy efficiency. Set up a simple schedule by adjusting temperatures for different times of the day directly on the thermostat. This process ensures functionality even without smart app integration, providing a user-friendly experience for those who prefer traditional operation.

Programming and Scheduling

Program custom heating and cooling schedules to optimize comfort and energy use. Set temperature adjustments for different times of the day via the touchscreen or mobile app.

Creating a Heating/Cooling Schedule

Creating a heating and cooling schedule on the Honeywell RTH8800WF2022 allows you to tailor your comfort settings to your daily routine. Using the touchscreen interface or the mobile app, you can set temperature adjustments for different times of the day. The thermostat offers a user-friendly menu system to program schedules for weekdays and weekends. You can also customize settings for specific times, such as waking up, leaving home, or going to bed. The schedule can be optimized to balance energy efficiency and comfort, ensuring your home is always at the right temperature when you need it. This feature helps reduce energy waste and saves on utility bills.

Home/Away and Vacation Features

The Honeywell RTH8800WF2022 thermostat offers Home/Away and Vacation features to enhance energy savings and convenience. The Home/Away mode allows you to set different temperature preferences when you’re at home or away, optimizing comfort and energy use. The Vacation mode enables you to program a temporary schedule for extended periods, ensuring your system runs efficiently while you’re away. These features can be easily managed through the thermostat’s interface or the mobile app, providing flexibility and peace of mind. By adjusting settings based on your presence, you can reduce energy consumption without compromising comfort. These modes are ideal for balancing energy efficiency and personal convenience.

Temperature Set-Point Adjustment

The Honeywell RTH8800WF2022 thermostat allows users to easily adjust temperature set-points for precise comfort control. This feature enables you to set specific temperatures for heating and cooling, ensuring your home stays at your preferred level. The thermostat’s intuitive touchscreen interface makes it simple to increase or decrease set-points manually. Additionally, the mobile app integration lets you adjust temperatures remotely, providing flexibility and convenience. Adjusting set-points is crucial for optimizing energy usage and maintaining desired comfort levels. The thermostat also supports smart scheduling, allowing you to pre-set temperature adjustments based on your daily routine. This feature ensures energy efficiency while maintaining comfort, making it a key component of the RTH8800WF2022’s functionality.

Smart Scheduling Options

The Honeywell RTH8800WF2022 thermostat offers advanced smart scheduling options that adapt to your lifestyle and preferences. With its intelligent learning capabilities, the thermostat can automatically adjust heating and cooling schedules based on your daily routines. This feature ensures optimal comfort while reducing energy waste. The smart scheduling system integrates seamlessly with the mobile app, allowing you to customize temperature settings remotely. Additionally, the thermostat supports geofencing, which adjusts temperatures based on your location, further enhancing energy efficiency. These smart scheduling options provide a convenient and intuitive way to manage your home’s climate, ensuring consistent comfort and energy savings without constant manual adjustments.

Smart Features and Connectivity

The Honeywell RTH8800WF2022 offers advanced smart features like Wi-Fi connectivity, voice control via smart speakers, and seamless integration with the Honeywell Home app for remote temperature adjustments.

Wi-Fi Network Setup and Requirements

Setting up the Honeywell RTH8800WF2022 on a Wi-Fi network ensures smart connectivity. The thermostat requires a 2.4 GHz Wi-Fi network for optimal performance. Begin by connecting the device to your home network via the Honeywell Home app. Ensure your router is compatible and within range. During setup, select your network from the app, enter the password, and follow prompts to complete the connection. A stable internet connection is essential for remote access and smart features. After successful setup, the thermostat will update to the latest firmware. If issues arise, restart the router or thermostat and retry. Proper Wi-Fi setup enables seamless smart home integration and remote temperature control.

Mobile App Integration

The Honeywell RTH8800WF2022 seamlessly integrates with the Honeywell Home app, enabling remote temperature control and enhanced smart features. Download the app on your iOS or Android device and connect it to your thermostat for full functionality. With mobile app integration, you can adjust settings, view current temperatures, and receive notifications about system performance. The app also allows scheduling adjustments and energy usage monitoring. Geofencing and smart alerts further enhance convenience, ensuring optimal comfort and efficiency. This integration simplifies thermostat management, offering flexibility and peace of mind whether you’re at home or away. Regular app updates ensure improved performance and new features.

Remote Temperature Control

The Honeywell RTH8800WF2022 allows for seamless remote temperature control through the Honeywell Home app. This feature enables users to adjust their home’s temperature from anywhere with an internet connection. Whether you’re at work, on vacation, or in another room, you can easily fine-tune your heating or cooling settings. The app provides real-time temperature monitoring and allows you to receive alerts for temperature changes. This convenience ensures your home is always at the perfect comfort level when you arrive. Remote control also helps optimize energy usage by allowing you to make adjustments based on your schedule or unexpected changes in plans.

Smart Home Compatibility

The Honeywell RTH8800WF2022 thermostat seamlessly integrates with popular smart home systems, enhancing your home automation experience. It is compatible with Amazon Alexa and Google Assistant, enabling voice control for temperature adjustments. Additionally, it supports Apple HomeKit, allowing iPhone and iPad users to manage their thermostat through the Home app. The thermostat also works with IFTTT (If This Then That) applets, enabling custom automation scenarios. This compatibility allows the RTH8800WF2022 to integrate with other smart devices, such as lights and security systems, for a unified smart home experience. By leveraging these integrations, users can enjoy voice commands, automated scenes, and enhanced convenience, making it a versatile choice for modern smart homes.

Troubleshooting Common Issues

This section helps diagnose and resolve common problems, such as connectivity issues, display malfunctions, or temperature inaccuracies, ensuring optimal thermostat performance and user convenience always.

Resolving Wi-Fi Connectivity Problems

Wi-Fi connectivity issues with the RTH8800WF2022 thermostat can disrupt smart features and remote access. Common causes include weak router signals, incorrect network passwords, or outdated firmware. To resolve, restart both the router and thermostat, ensuring they are within range. Verify the Wi-Fi password entered during setup. Check for firmware updates in the app, as outdated software may cause connectivity problems. If issues persist, reset the thermostat to factory settings and reconfigure the network connection. Ensure the router operates on a compatible frequency band (2.4GHz or 5GHz). For persistent problems, consult the user manual or contact Honeywell support for assistance. Proper connectivity is essential for optimal performance.

Fixing Display and Touchscreen Issues

Display and touchscreen problems on the RTH8800WF2022 thermostat can hinder operation. Common issues include an unresponsive touchscreen, dim or blank display, or incorrect display of information. To address these, first ensure the thermostat is properly powered and check for loose wiring connections. Restart the device by turning it off and on at the circuit breaker. Clean the touchscreen gently with a soft cloth to remove dirt or smudges. If the display remains dim, adjust the screen brightness settings in the menu. For persistent issues, perform a factory reset by holding the “Menu” and “Down” buttons simultaneously for 10 seconds. If problems continue, contact Honeywell support for further assistance or potential hardware replacement. Proper functionality ensures accurate temperature control and user convenience.

Addressing Temperature Control Malfunctions

Temperature control malfunctions on the RTH8800WF2022 thermostat can disrupt heating or cooling performance. If the system fails to reach the set temperature, check if the thermostat is properly calibrated. Ensure the temperature sensor is clean and free from obstructions. Verify that the HVAC system is correctly sized for your space. If the thermostat isn’t responding, restart it by turning off power at the circuit breaker for 30 seconds. Resetting the device or updating its software may resolve issues. If the problem persists, inspect wiring connections for damage or looseness. Consult the user manual for recalibration steps or contact Honeywell support for assistance. Proper calibration ensures accurate temperature control and system efficiency.

Rebooting and Resetting the Thermostat

Rebooting or resetting the RTH8800WF2022 thermostat can resolve software-related issues. To reboot, turn off power at the circuit breaker for 30 seconds. This restarts the system without erasing settings. For a factory reset, press and hold the “Menu” button, navigate to “Reset,” and select “Reset to Factory Settings.” This restores default settings, so you’ll need to reconfigure preferences. Use this option if persistent issues arise. Resetting does not affect Wi-Fi credentials but clears schedules and customizations. Always reboot first before performing a factory reset to avoid unnecessary setup. Regular reboots can maintain optimal performance. Refer to the user manual for detailed reset procedures and precautions to ensure a smooth process and retain necessary configurations.

Energy Efficiency and Savings

The RTH8800WF2022 promotes energy efficiency through smart scheduling, geofencing, and adaptive learning, optimizing heating and cooling usage to reduce energy consumption and lower utility bills effectively.

Energy-Saving Features

The Honeywell RTH8800WF2022 thermostat includes advanced energy-saving features such as smart scheduling, geofencing, and energy usage reports. These tools help reduce energy waste by optimizing heating and cooling based on your lifestyle and preferences. The thermostat learns your schedule and adjusts temperatures automatically when you’re away or asleep. Geofencing uses your location to switch to energy-saving modes, while detailed reports provide insights into your energy consumption. These features work together to minimize unnecessary energy use, helping you save money on utility bills while maintaining comfort; By leveraging these technologies, the RTH8800WF2022 makes it easy to achieve significant energy efficiency without sacrificing convenience or performance.

Optimizing Heating and Cooling Usage

The Honeywell RTH8800WF2022 thermostat offers advanced features to optimize heating and cooling usage, ensuring energy efficiency without compromising comfort. Its learning capabilities adapt to your schedule, automatically adjusting temperatures during periods of inactivity or when you’re asleep. The thermostat also integrates geofencing, which senses your location to switch to energy-saving modes when you’re away from home. Additionally, smart recovery ensures your home reaches the desired temperature efficiently, avoiding unnecessary heating or cooling. These features work together to minimize energy waste and extend the lifespan of your HVAC system. By optimizing usage, the RTH8800WF2022 helps you achieve significant energy savings while maintaining a comfortable living environment.

Understanding Energy Reports

The Honeywell RTH8800WF2022 thermostat provides detailed energy reports to help you monitor and manage your energy consumption. These reports offer insights into your heating and cooling usage patterns, identifying periods of high energy demand. The data is presented in a user-friendly format, showing energy usage in kilowatt-hours (kWh) or dollars, depending on your preferences. By analyzing these reports, you can identify trends, such as increased cooling usage during summer months or heating spikes in winter. This information allows you to adjust your settings and habits to reduce energy waste. Accessing energy reports is convenient through the mobile app, enabling you to make informed decisions and optimize your energy savings.

Smart Energy Management Tips

Smart energy management with the Honeywell RTH8800WF2022 involves utilizing advanced features to optimize energy usage. Geofencing automatically adjusts the temperature based on your location, reducing waste when you’re away. Smart scheduling allows you to create energy-saving routines that align with your daily activities. Integrating with smart home systems like Amazon Alexa or Google Home enables voice control, making it easier to manage settings. Adjusting temperature set points by a few degrees can significantly lower energy consumption. Regularly reviewing energy reports helps identify trends and areas for improvement. By combining these strategies, you can enhance efficiency, reduce costs, and maintain a comfortable home environment effortlessly.

Advanced Settings and Customization

Customize temperature ranges, geofencing, and smart scheduling for tailored comfort. Adjust settings via the app or thermostat interface for precise control and energy efficiency.

Adjusting Thermostat Settings Manually

Manually adjusting the Honeywell RTH8800WF2022 thermostat settings allows for precise temperature control. Users can change the temperature setpoints, switch between heating and cooling modes, and adjust fan settings directly on the thermostat. The touchscreen interface provides easy access to these settings, enabling immediate changes without relying on automation. Manual adjustments are ideal for quick comfort tweaks or overriding scheduled settings temporarily. The thermostat also supports manual overrides for humidity levels and airflow circulation. By navigating through the menu options, users can customize their comfort experience according to their preferences. This feature ensures flexibility and adaptability for varying household needs and conditions.

Customizing Temperature Ranges

Customizing temperature ranges on the Honeywell RTH8800WF2022 thermostat allows users to define preferred heating and cooling setpoints. This feature ensures the system operates within a specific temperature range, optimizing comfort and energy efficiency. Users can set minimum and maximum temperatures to avoid extreme settings, which helps in maintaining consistent indoor conditions. The thermostat’s touchscreen interface makes it easy to adjust these ranges, while the advanced settings provide flexibility for different scenarios. Customizing temperature ranges is particularly useful for preventing overheating or overcooling, ensuring the system runs efficiently. This feature also supports humidity control and geofencing integration, enhancing overall climate management in the home.

Setting Up Geofencing

Setting up geofencing on the Honeywell RTH8800WF2022 thermostat involves using the Honeywell Home app to create a virtual boundary around your home. This feature automatically adjusts the thermostat based on your location, switching to energy-saving mode when you leave and resuming comfort settings when you return. To enable geofencing, open the app, navigate to the location settings, and toggle on the geofencing option. Ensure your smartphone’s location services are enabled and that the app has permission to access your location. You can customize the geofencing radius to suit your needs, ensuring seamless transitions between home and away modes. This feature enhances energy efficiency and convenience, as it eliminates the need to manually adjust settings.

Advanced Scheduling Options

The Honeywell RTH8800WF2022 thermostat offers advanced scheduling options to optimize your heating and cooling system. You can create detailed, customizable schedules with multiple time slots per day. For example, you can set different temperatures for waking up, leaving home, returning, and sleeping. These schedules can be tailored for weekdays and weekends, providing maximum flexibility. The thermostat also allows you to override schedules temporarily without disrupting the overall program. Advanced scheduling ensures your system runs efficiently, reducing energy waste while maintaining comfort. Use the thermostat interface or the Honeywell Home app to set up and adjust these schedules. This feature is ideal for households with varying routines and preferences, making it easy to balance energy savings with personal comfort.

User Manual and Guides

The Honeywell RTH8800WF2022 user manual offers detailed guidance on installation, features, and troubleshooting. Access it online in PDF format for comprehensive support and optimal thermostat operation.

Accessing the RTH8800WF2022 User Manual

To access the Honeywell RTH8800WF2022 user manual, visit the official Honeywell website or the product page. The manual is available for download in PDF format, ensuring easy access to detailed installation, programming, and troubleshooting instructions. You can also find it through Honeywell’s customer support portal or by scanning the QR code provided with the thermostat packaging. Adobe Acrobat Reader or a similar PDF viewer is required to open the file. The manual covers essential topics like system compatibility, wiring diagrams, and advanced features. It’s a comprehensive guide designed to help users maximize the thermostat’s functionality and efficiency. Always refer to the official Honeywell website for the most updated version.

Understanding the Quick Install Guide

The Quick Install Guide for the Honeywell RTH8800WF2022 thermostat is a concise, step-by-step resource designed to simplify the installation process. It is typically included in the packaging or available as a downloadable PDF alongside the full user manual. The guide focuses on essential tasks, such as compatibility checks, wiring diagrams, and physical installation steps. It provides clear visuals and minimal text to help users quickly understand the setup process. While it doesn’t cover advanced features, it ensures a smooth initial installation. For detailed configuration or troubleshooting, refer to the full user manual. This guide is ideal for DIY enthusiasts or professionals seeking a streamlined setup experience.

Navigating the PDF Manual

The Honeywell RTH8800WF2022 manual is available as a downloadable PDF, offering a comprehensive guide to thermostat operation. The document is structured with clear sections, including installation, programming, and troubleshooting. Users can easily navigate using bookmarks and a detailed table of contents. The PDF includes high-resolution images, diagrams, and step-by-step instructions to ensure clarity. Key features like smart scheduling and energy-saving tips are highlighted. The manual also provides troubleshooting guides and technical specifications. To enhance readability, users can zoom in/out and search for specific keywords. Regular updates to the PDF ensure the latest features and fixes are documented. Always refer to the official Honeywell website for the most current version of the manual.

Additional Resources and Support

Beyond the manual, Honeywell offers extensive resources to assist RTH8800WF2022 users. The official Honeywell website provides downloadable guides, FAQs, and troubleshooting tips. Users can also access community forums where experts and homeowners share solutions and advice. Additionally, Honeywell’s customer support team is available via phone, email, or live chat to address specific concerns. For visual learners, YouTube tutorials and installation videos are available. The Honeywell Home app also includes in-app support and links to helpful articles. These resources ensure users can resolve issues and maximize their thermostat’s functionality. Regular updates and notifications from Honeywell keep users informed about new features and maintenance tips.